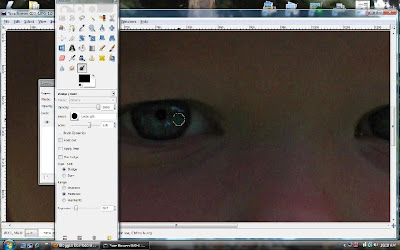
This is one of my favorite pictures of Nutty but I have often thought her eyes look a bit washed out and they don't stand out enough against the colors of the background. I'm going to make her eyes "pop".
Step 1) Zoom way in and use the lasso tool to select around each iris. Make sure you have the "feather edges" checked. Hold down the shift key to select both irises at the same time.
Step 2) Copy your selections.
Step 3) Create a new layer and label it whatever you want. The default layer settings are just fine.
Step 4) Easy so far huh? Now use CTRL + L to view your layers and select only your eye layer. (The little eye ball should be on only next to your new layer and not next to your original layer.)
Step 5) Paste your copied eyes into your new layer. Make sure to use "paste into" and not "paste".
Step 6) Next use your "unsharp mask" to sharpen the eyes. Ok, I know, we are using unsharp to sharpen the eyes. Doesn't make sense, does it? Well, it's an unsharp mask which means it's masking anything that makes the image unsharp. Backward, I know but that's the way it is.
Step 7) Now play around with your Hue/Lightness/Saturation. There is no right or wrong way to do this, and I'm not going to give you exact settings. Just play around until it looks good to you. Make sure, however, that no matter what you do, you keep things looking natural.
Step 8) Got the colors and brightness you want? Good. Now use your burn tool to bring out the pupils and the outer edges of the iris.
Step 9) Next use your dodge tool to lighten the iris a bit on the bottom side. Note that the default dodge setting is probably too bright and you will have to adjust the exposure to dull it down. Disclaimer: I completely forgot this step last night as I was setting up this tutorial. I added it in this morning thus the fact the eyes are not in their own layer like above.

You're done! Combine your two layers making your eye layer on the top. Congratulations! You just made your eyes "pop"! That wasn't so bad was it?
Here's the much anticipated before and after:
There is no real right or wrong way to make eyes pop in a picture. Google "eye pop photo" or something similar and you'll get plenty of tutorials on how to do it with specific settings how that person likes it done. I say, do what you think looks best and simply play around. You can always "undo" something if you don't like it. I did a lot of "undo" as I was making this tutorial!


2 comments:
That's awesome! Seriously. I have photoshop elements, but don't know how to use it very well at all. You even helped me on what direction to go there!
Thanks for the GIMP tutorial! I need these!
Post a Comment