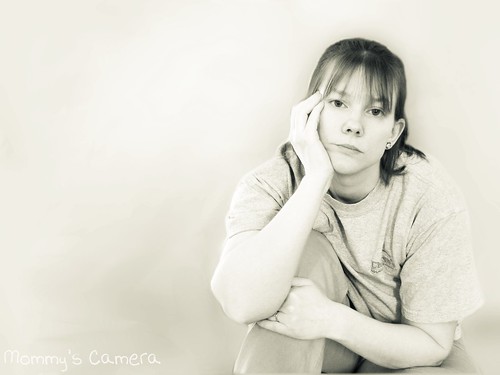
Without further ado....The before picture:
Yuck!
The After photo:

Much better!
To be honest, I can't remember all the steps I did but here's what I *think* I did: (edited using Gimp)
1) cropped it
2) significantly blurred the background
3) added a blue, lightly textured overlay to the background
4) created 2 copies of the photo
5) ran a split tone on one copy and turned the other black and white
6) overlayed the split tone onto the black and white copy
There might be one or two steps missing but I'm not sure :)
This photo is part of my 45 POM Project. For more info about the project visit my PAD/365 Blog. To see all the photos (so far) in one easy place, visit my Facebook Photos.
For more Before and After fun:


11 comments:
Wow... what a great edit. Where did you get the most help learning GIMP. I have the program - but I am clueless and have a one year old... so I don;t have the time I need to just sit and play.
I think your after looks incredible. Nicely done.
Hi Jamie! Thanks for stopping by and sharing my post on twitter! I think your edit is very well done! Great job removing background objects.
Great edit. I like your B&W conversion and cleanup of the background.
What a great edit! Good job.
Marla @ www.blueskiesphotoblog.com
Your edit turned out great..love the brightness and crop! Thanks for the visit.
Tiffany
Great editing, Jamie!
I love this. It looks so good!! So what is Gimp?
What a beautiful edit...love it!
Wow what a change! Congrats on winning the Texture Masters Pack from the Ultimate Blog Party!
What a change! Great job!
Post a Comment